17 Modern Kitchen Backsplash Ideas That Designers Actually Love
From handmade zellige and fluted ceramics to dramatic stone slabs and unexpected plaster finishes — the backsplash ideas that are genuinely worth your budget in 2026.
The backsplash is the most personal decision in a kitchen remodel. Unlike cabinetry or countertops — choices that are largely defined by budget and practicality — the backsplash is where you get to make a genuine aesthetic statement. It’s the first thing guests notice and the last thing you stop noticing yourself.
The problem is that most backsplash guides recycle the same tired ideas: white subway tile, grey glass mosaic, basic herringbone. This one doesn’t. We’ve focused exclusively on the backsplash approaches that interior designers are actually specifying in 2026 — materials and ideas with real visual staying power that will look just as considered in ten years as they do today.
Each idea below includes what makes it work, who it suits, what it costs, and how to execute it properly. Whether you’re tiling your entire kitchen or refreshing just the range wall, there’s an idea here worth stealing.
Not sure which kitchen style suits your home? Take our 2-minute quiz for a personalized direction before you choose your backsplash.
Tile & Stone Backsplashes
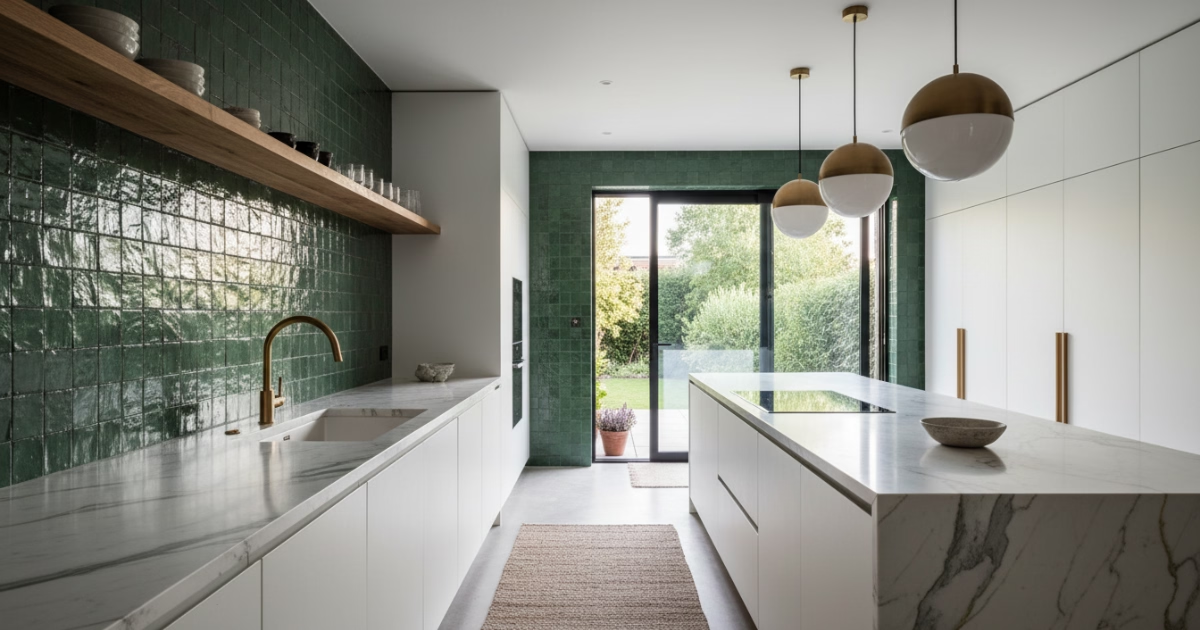
Ideas 1–9Zellige Tile: The Handmade Moroccan Statement
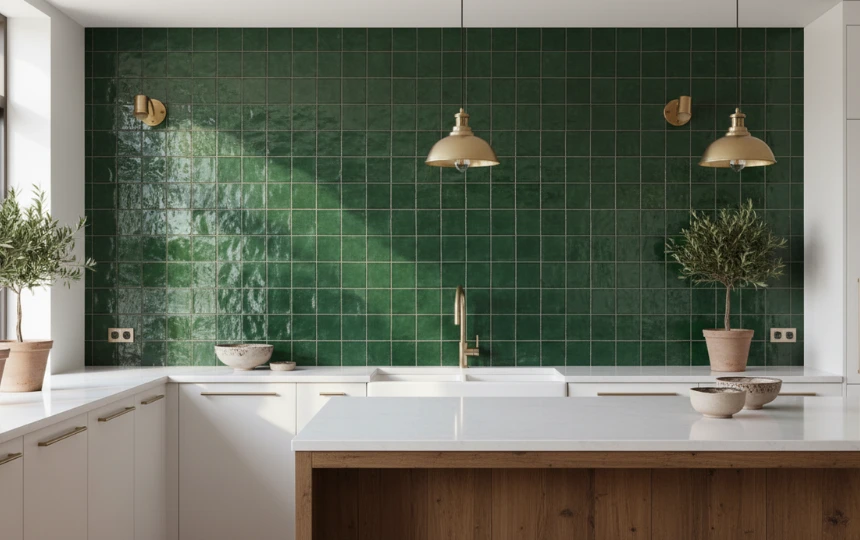
Zellige tile has moved from niche to mainstream in the past three years — and it’s easy to see why. These hand-cut Moroccan clay tiles, fired with mineral glazes, have a rippling, dimensional surface that no machine-made tile can match. Every tile is slightly different in thickness and glaze depth, creating a surface that catches light constantly throughout the day. Deep hunter green remains the most sought-after color, but terracotta, sage, dusty blue, and teal all work beautifully. Install in a simple grid or straight-stack bond — not herringbone, which fights the natural variation. Use a grout color that matches or closely complements the tile, and the texture will do all the work. Budget $18–$45 per square foot installed.
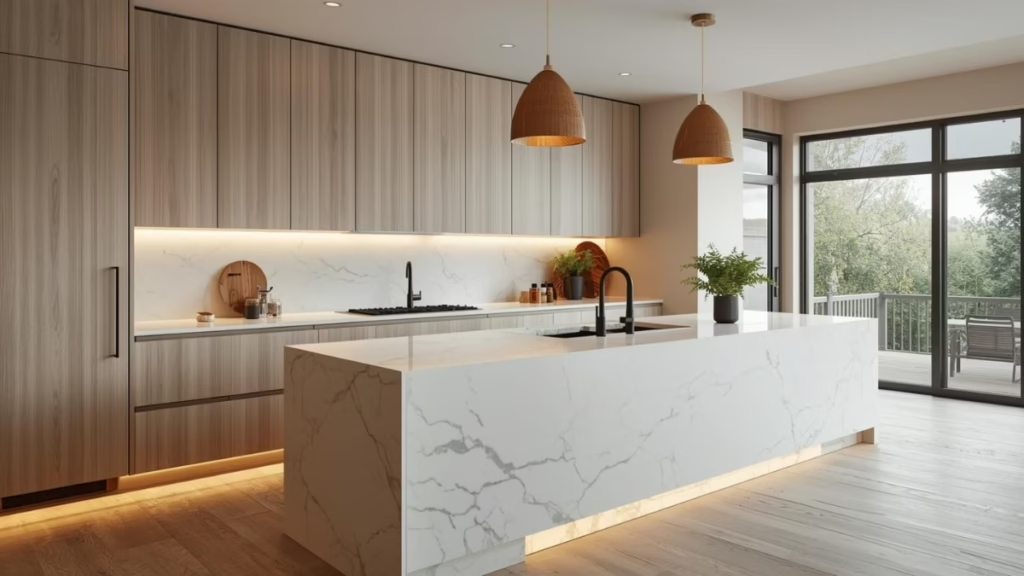
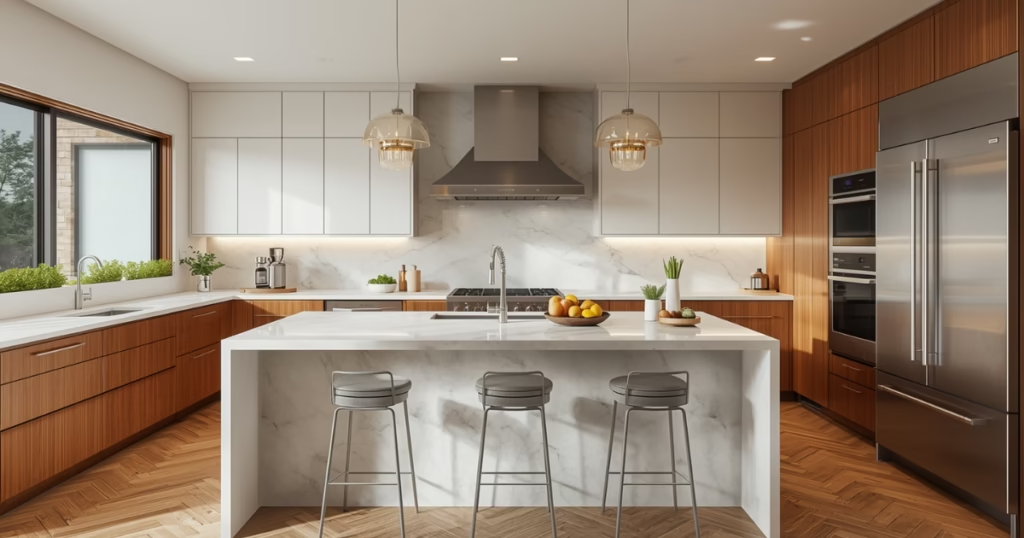
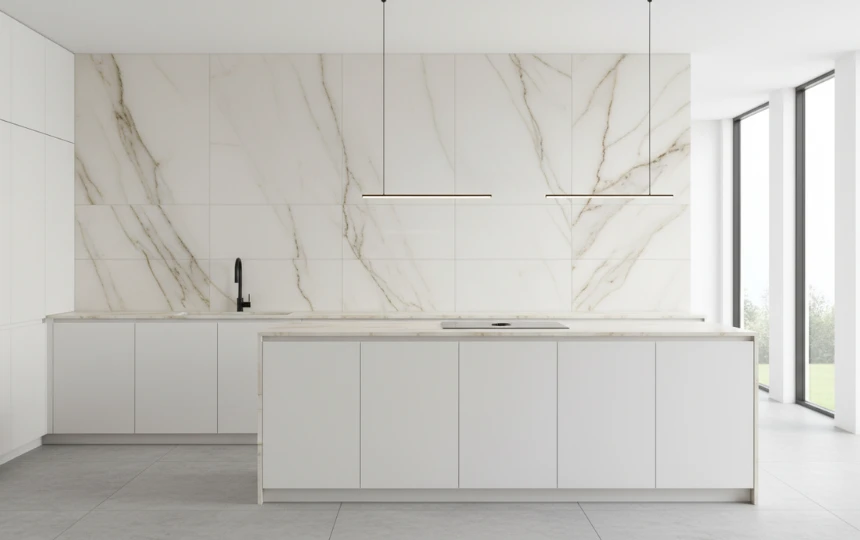
Full-Height Stone Slab: Seamless & Sculptural
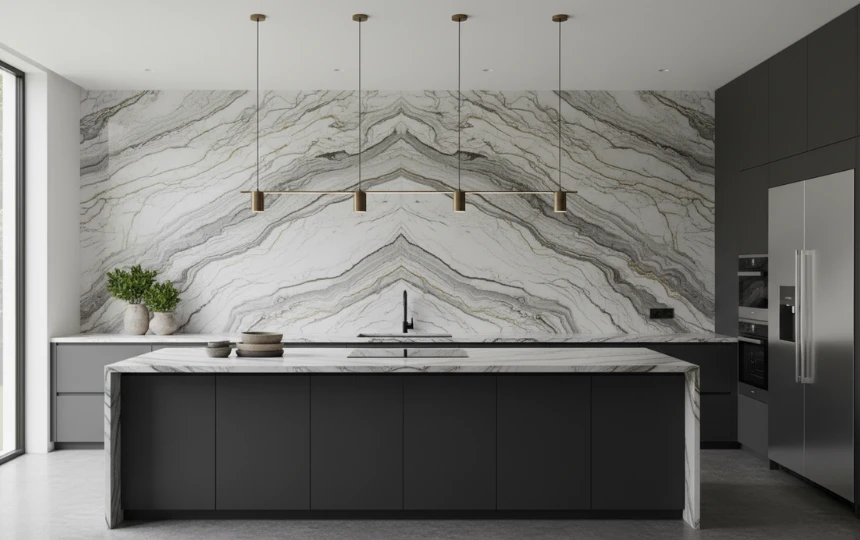
Running the same stone or quartz slab that covers your countertop directly up the wall as a full-height backsplash creates the most seamless, architecturally refined surface possible. There are no grout lines, no tile joints, no visual interruptions — just a single, unbroken plane of material from work surface to upper cabinet. The effect is most dramatic with heavily veined stones like Calacatta Viola, Paonazzo marble, or Fusion quartzite, where the veining flows from horizontal to vertical in an uninterrupted sweep. This isn’t a budget approach — expect to pay $150–$350 per square foot for premium stone plus professional installation — but nothing else comes close to the visual impact it delivers.
Fluted & Ribbed Tile: The 3D Texture Moment
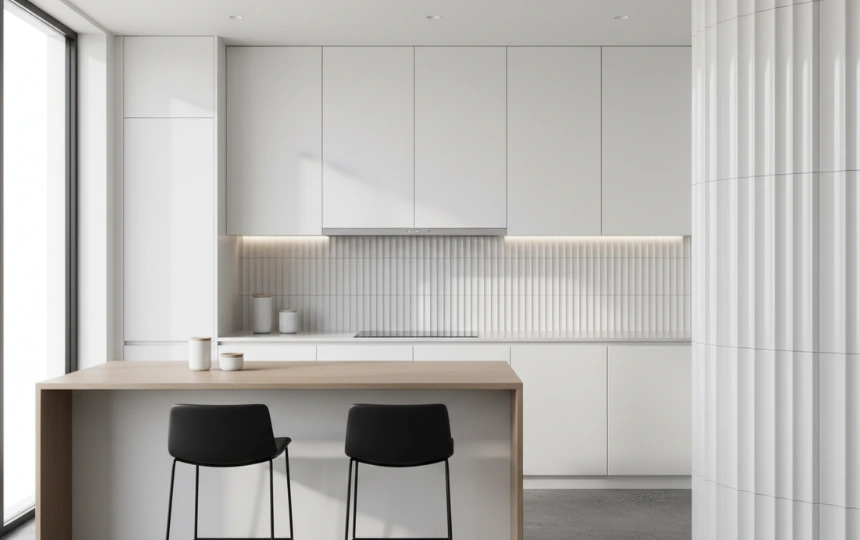
Fluted tiles — with their parallel ridges creating three-dimensional profiles — have become one of the defining backsplash looks of the mid-2020s. The ridges cast shadow lines that shift constantly as daylight moves, giving the wall a subtle, living quality that flat tiles simply can’t replicate. Vertically oriented ribs look the most modern and architectural. Gloss-finished versions amplify the light play; matte versions give a softer, more Japandi-adjacent result. The key is to let the tile do all the work: pair with flat-front handleless cabinets, a simple countertop, and no busy grout pattern. Pricing runs $8–$30 per square foot depending on the manufacturer, making this one of the best-value high-impact backsplash options available.
Limewash & Venetian Plaster: The Anti-Tile Backsplash
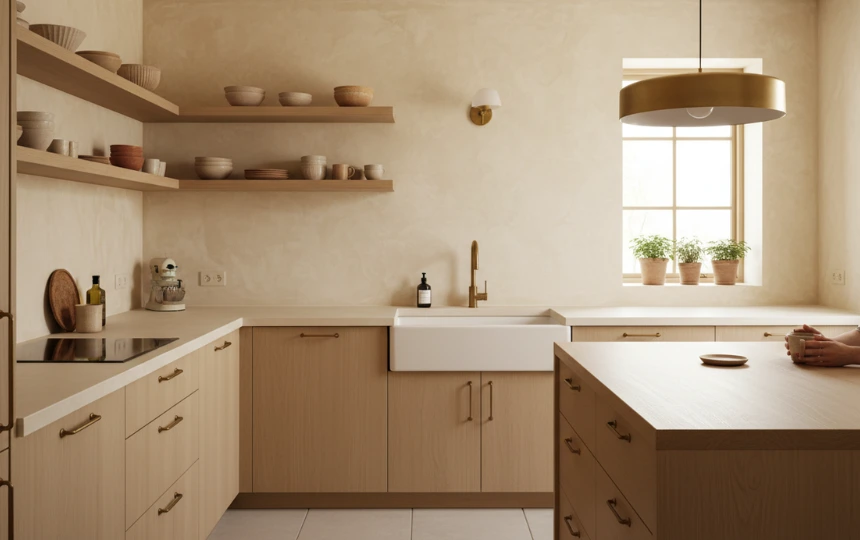
The idea that a backsplash must be tile is worth challenging — and limewash or Venetian plaster finishes offer one of the most compelling alternatives. Applied directly to the wall, these mineral-based finishes develop a soft, layered depth that shifts between warm and cool as light changes throughout the day. They’re naturally antimicrobial, can be wiped clean when sealed with a matte topcoat, and create a surface that genuinely cannot be replicated by any manufactured product. Best used in the zone above a low-splash range or alongside windows where moisture is limited. The aesthetic is distinctly grown-up: quiet, artistic, and completely personal. Cost is primarily labor — expect $12–$25 per square foot for a skilled plasterer.
Classic Subway Tile — Completely Reimagined
Subway tile isn’t dated — it’s just overused in its default white-glossy-brick-bond form. Change one variable and you get something completely different. Try charcoal, sage green, or dusty rose instead of white. Switch from a brick offset to a vertical stacked bond for a sharper, more modern look. Go with a matte rather than gloss glaze to reduce the clinical edge. Use a wide, colored grout that becomes part of the pattern rather than an afterthought. Go extra slim (1.5 × 6 inch) instead of standard 3 × 6. Each of these changes transforms the subway tile from builder-grade safe to genuinely considered. At $3–$12 per square foot, it’s also one of the most accessible options on this list when executed with proper intention.
Bold Graphic Encaustic Tile: Maximum Personality
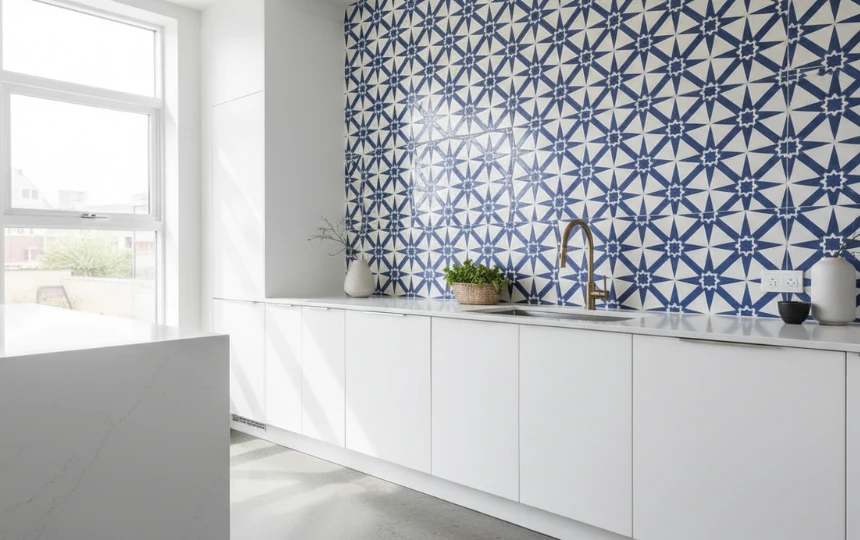
A bold, patterned backsplash is the single fastest way to give a kitchen genuine personality — and when you commit fully, the result is a room that feels curated rather than assembled. Encaustic cement tiles (handmade, with color pigments pressed into the body rather than applied as a glaze) are the gold standard for pattern backsplashes: the color runs through the tile, so it chips without showing a different-colored body underneath. Moroccan geometric patterns, Art Deco diamonds, botanical florals, and Portuguese azulejo-inspired designs all work beautifully. The critical design rule: if the backsplash is doing all the talking, everything else must be quiet. White cabinets, plain countertops, simple hardware — let the tile be the entire statement.
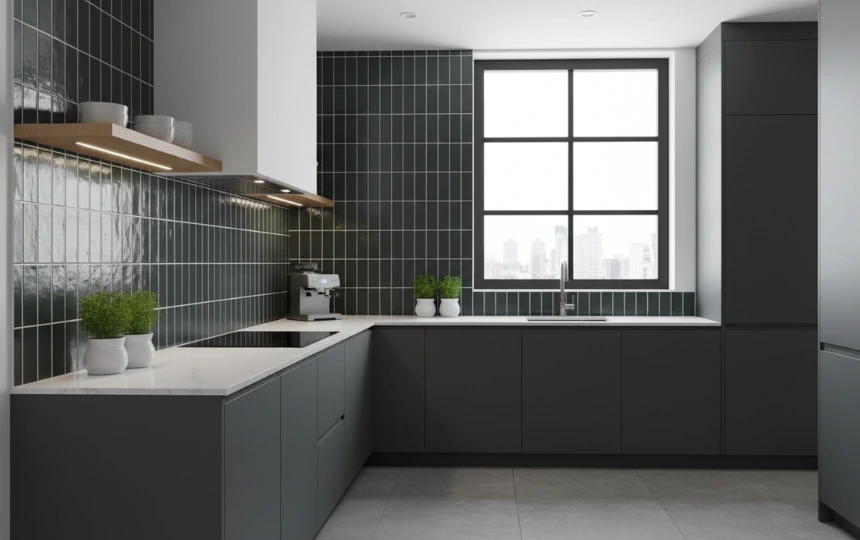
Stacked Slim Brick in Unexpected Colors
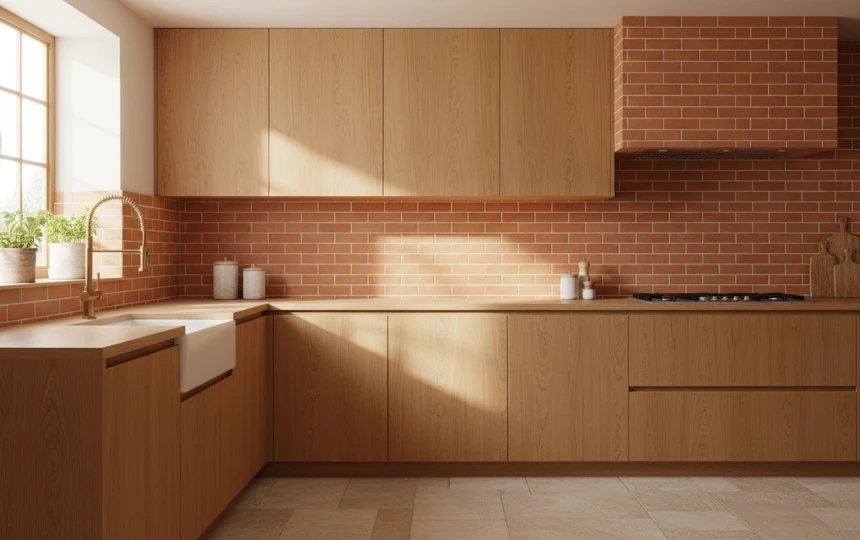
Slim brick tiles — typically 1.5 × 6 inches or 2 × 8 inches — installed in a straight-stacked bond (not offset) create a distinctly architectural backsplash that references masonry without feeling industrial or rough. The format is classic but the color possibilities are where it gets interesting: warm terracotta, dusty clay, deep rust, olive green, and midnight blue all produce backsplashes with real material depth. The stacked bond (tiles aligned directly above each other, unlike traditional brick offset) looks sharper and more intentionally modern. Pair tight with very minimal grout joints for the cleanest result. This works particularly well with natural wood cabinetry and stone countertops — a warm, natural-materials palette that feels both contemporary and timeless.
Terrazzo: The Comeback Surface

Terrazzo — the Italian composite of marble or stone chips set in cement or resin — has had a remarkable resurgence in residential design, and as a backsplash material it delivers something few other tiles can: controlled randomness. Each slab or tile is slightly different because the aggregate distribution is never identical, giving a handmade quality alongside the advantages of a durable manufactured product. Modern terrazzo has moved far beyond the green-and-grey institutional look of the 1970s — today’s options include warm cream bases with pink marble chips, charcoal backgrounds with brass or gold aggregates, and pale terrazzo with mint and coral. For maximum impact, carry the same terrazzo from the backsplash down through the floor, creating a unified surface story.
Mirror & Smoked Glass Panels: Light and Drama
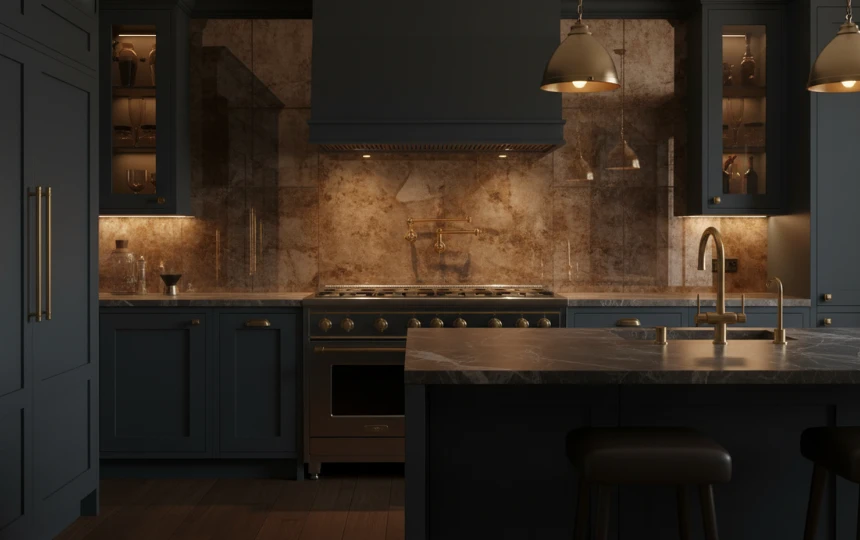
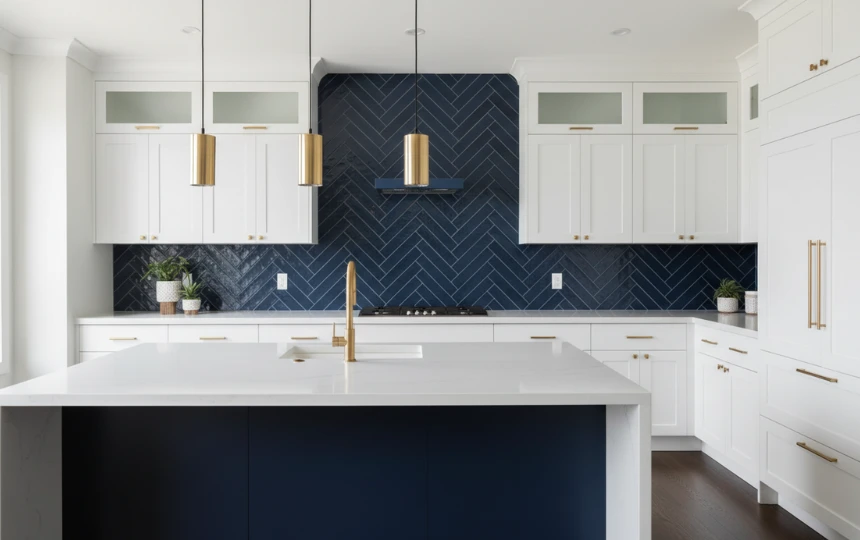
Mirror or smoked glass backsplash panels are the choice for kitchens that need to feel larger and more dramatic simultaneously. Standard mirror reads as dated, but antique or smoked glass — with its warm amber or bronze tint and subtle mottled quality — is genuinely sophisticated. The material reflects light around the kitchen, brightening darker spaces without the harshness of a clear mirror. Installed as full panels behind the range or between upper and lower cabinets, it creates depth and visual interest that no tile can match. This works particularly well in dark kitchens — navy, charcoal, or forest green cabinetry with smoked mirror backsplash and brass fixtures produces one of the most dramatic kitchen combinations in current design.
Get a realistic cost estimate for your full kitchen renovation — backsplash, cabinetry, countertops, and more.
Backsplash Material Quick-Compare Guide
Buyer’s GuideBefore choosing, it helps to understand how the main materials stack up on the factors that matter most — durability, maintenance, and cost:
| Material | Durability | Maintenance | Installed Cost/sqft | Best Style Fit |
|---|---|---|---|---|
| Zellige Tile | ★★★★☆ | Low | $18–$45 | Warm Modern, Eclectic |
| Stone Slab | ★★★★★ | Low–Medium | $150–$350 | Luxury, Contemporary |
| Fluted Ceramic | ★★★★★ | Very Low | $12–$35 | Minimalist, Japandi |
| Limewash Plaster | ★★★☆☆ | Medium | $12–$25 | Organic, Artisanal |
| Subway Tile | ★★★★★ | Very Low | $6–$18 | Any — highly versatile |
| Encaustic Cement | ★★★☆☆ | Medium | $20–$55 | Eclectic, Bohemian |
| Terrazzo | ★★★★★ | Low | $25–$60 | Contemporary, Playful |
| Smoked Glass | ★★★★☆ | Low | $40–$90 | Moody, Dark Kitchens |
| Large Porcelain | ★★★★★ | Very Low | $20–$60 | Modern, Minimalist |
| Microcement | ★★★☆☆ | Medium | $15–$30 | Industrial, Loft |
Specialty & Unexpected Backsplash Ideas
Ideas 10–17Unlacquered Brass Panels: Warm Metal Luxury
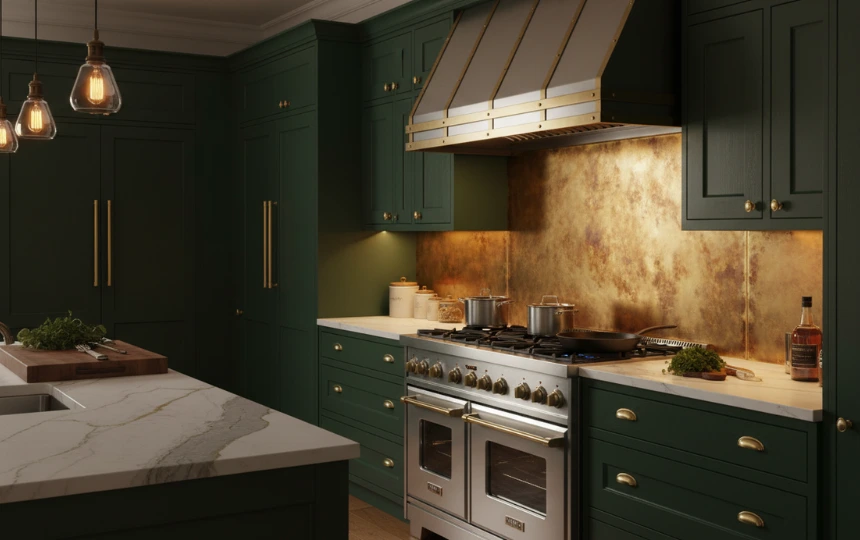
Metal backsplash panels — particularly in unlacquered brass — occupy a category of their own. Unlike tile or stone, metal is a live material that changes over time: unlacquered brass gradually develops a warm, amber-to-dark patina that makes the kitchen feel more personal and more interesting every year. Installed as a single seamless panel behind a professional range, it creates a focal point that’s simultaneously practical (extremely heat-resistant, wipes clean in seconds) and extraordinarily beautiful. The effect works best in kitchens where the brass has some visual competition — deep green, navy, or charcoal cabinetry rather than white. For a more accessible price point, warm brass-finished tiles achieve a similar look at a fraction of the cost.
Large-Format Porcelain: The Minimal Statement
Large-format porcelain tiles — 60×60 cm, 60×120 cm, or even larger — create backsplashes with almost no visible grout lines, producing the seamless quality of stone at a fraction of the cost and with virtually zero maintenance. Modern digital printing technology means these tiles can faithfully replicate Calacatta marble, quartzite, concrete, and other premium materials at a quality that’s genuinely convincing at normal viewing distances. The minimal grout joint also means no discoloration or scrubbing — the surface stays looking clean with a simple wipe. This is the highest-function, lowest-maintenance backsplash option on this list. Best suited to minimalist and contemporary kitchens where clean, uninterrupted surfaces are the design priority.
Scallop & Fish-Scale Tile: Playful Geometry
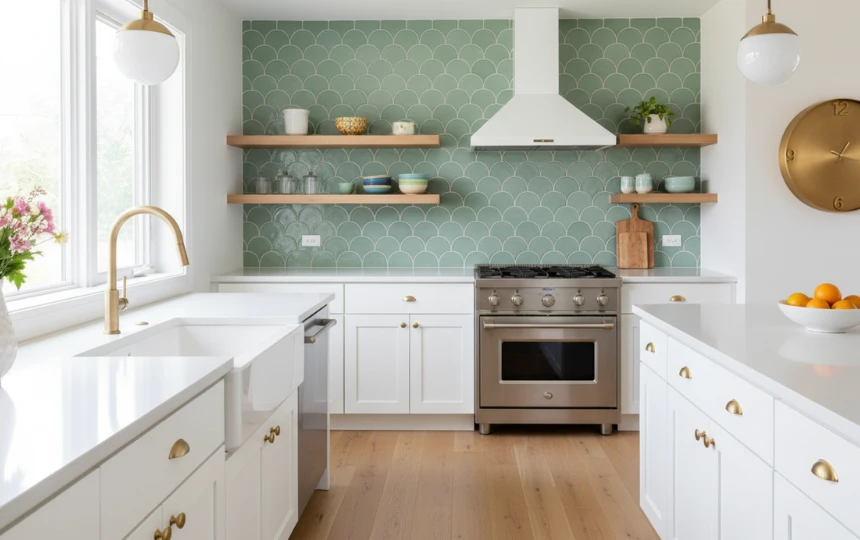
Scallop or fish-scale tiles — with their overlapping curved shapes that reference both Art Nouveau and traditional East Asian architecture — offer one of the few tile formats where the tile’s shape itself is the design, independent of color or pattern. The overlapping arches create a dynamic, almost three-dimensional surface that catches light from multiple angles as you move around the kitchen. In soft sage green, dusty rose, warm white, or pale blue, the result is quietly charming rather than aggressive. In deep navy or forest green, the effect becomes bolder and more graphic. This tile works in kitchens that welcome personality — transitional, coastal, and contemporary-eclectic settings particularly. Expect $15–$40 per square foot for a quality ceramic version.
Natural Stone Mosaic: Organic Texture at Small Scale
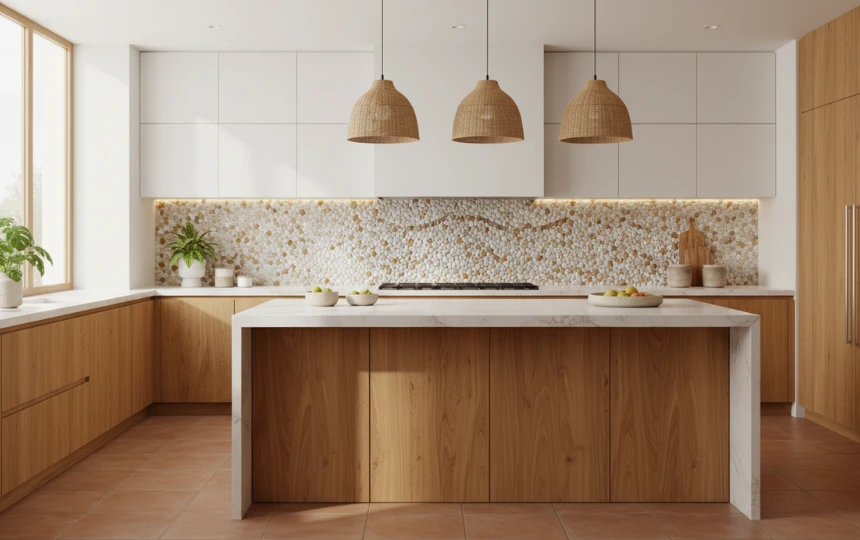
Natural stone mosaics — small-format chips of travertine, marble, slate, or mixed stone mounted on mesh backing — create the richest, most organically textured backsplash surface of any option on this list. Unlike large tiles that present a clean, planar surface, stone mosaic is genuinely three-dimensional: the variation in chip height creates micro-shadows that give the wall an almost tactile quality in photographs and a genuinely beautiful depth in person. The format suits warm, natural-materials kitchens — white oak cabinetry, concrete countertops, or honed stone surfaces — better than sleek, modern ones. One practical note: the many small grout joints require diligent sealing and cleaning; this is a high-character but higher-maintenance choice.
Painted Shiplap or Panel Moulding: The Budget Architectural Move
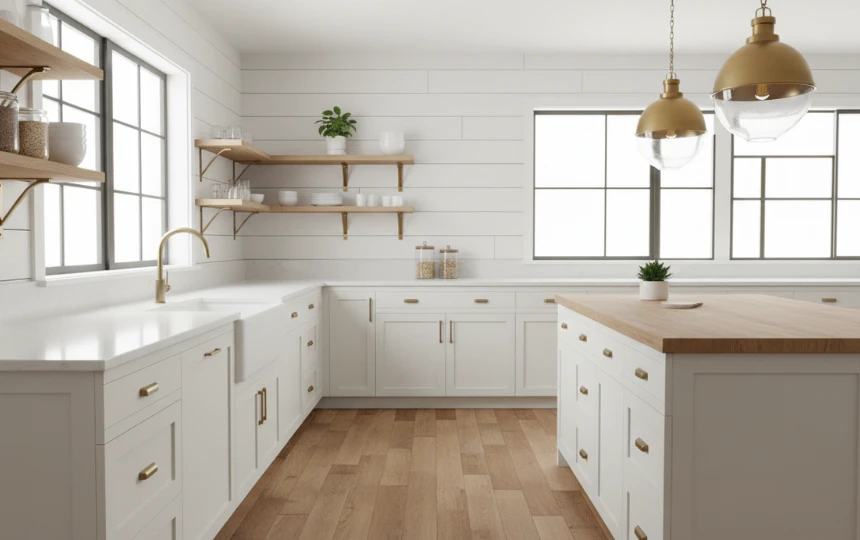
Painted wood panelling — whether shiplap, beadboard, or applied panel moulding — is the most underrated backsplash approach for kitchens where budget is a real constraint but design quality is still paramount. Sealed and painted (a satin or semi-gloss finish is essential for wipeability), wood panelling creates genuine architectural texture that tile cannot match. Applied panel moulding in a grid pattern painted the same color as the cabinets creates a unified, furniture-grade backdrop that reads as intentional and expensive. Best suited to kitchens away from the range and sink where moisture is minimal, though a proper paint seal handles light splashing fine. This approach suits farmhouse, coastal, and transitional kitchens where warmth and handmade character are the design goals.
Herringbone Pattern in Unexpected Colors
The herringbone pattern — tiles laid in a V-shaped zigzag — is one of architecture’s most enduring layouts, found everywhere from Roman roads to Versailles parquet floors. As a backsplash, it creates a dynamic, directional energy that a straight-set tile simply can’t generate. The key in 2026 is color: standard white herringbone has been everywhere for a decade. Deep navy, hunter green, terracotta, or dusty sage herringbone in a slim elongated format (2×8 or 3×9 inch tiles emphasize the directionality particularly well) produces something with genuine visual authority. Use a grout that matches the tile closely — the pattern reads most strongly when the grout lines aren’t competing with it. Budget $10–$25 per square foot for quality ceramic versions.
Shou Sugi Ban: Charred Wood Drama
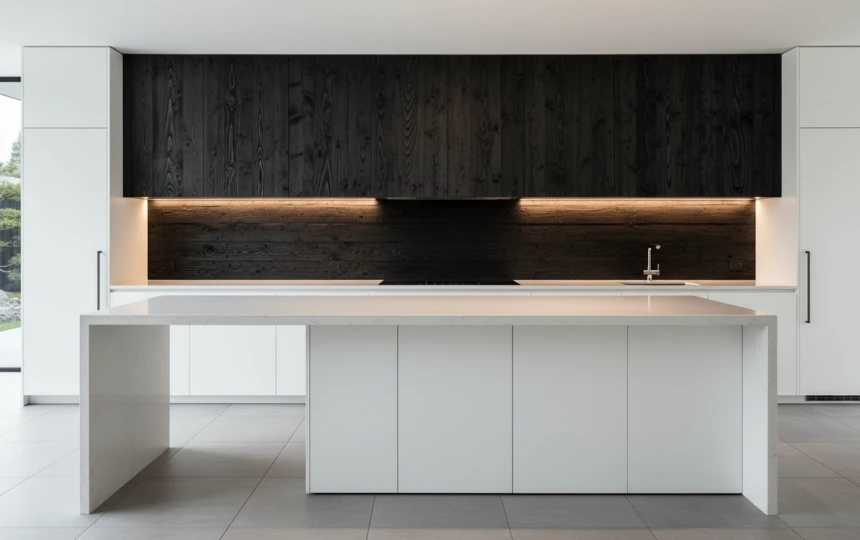
Shou sugi ban — the ancient Japanese technique of charring wood to carbonize its surface, dramatically increasing its durability and weather resistance — produces one of the most striking backsplash materials available. The charred surface is deep black with visible wood grain beneath, creating a textural complexity that is simultaneously rustic and architectural. Properly sealed with a clear penetrating oil, it’s more durable and fire-resistant than untreated wood. The contrast of charred black wood against white or light stone creates one of the most photographed kitchen moments in contemporary design. This is a commitment piece — it works best as a full-range surround or a dedicated accent wall rather than a partial treatment — and suits minimalist, Japandi, and contemporary-eclectic kitchens.
Microcement & Concrete: Industrial Warmth
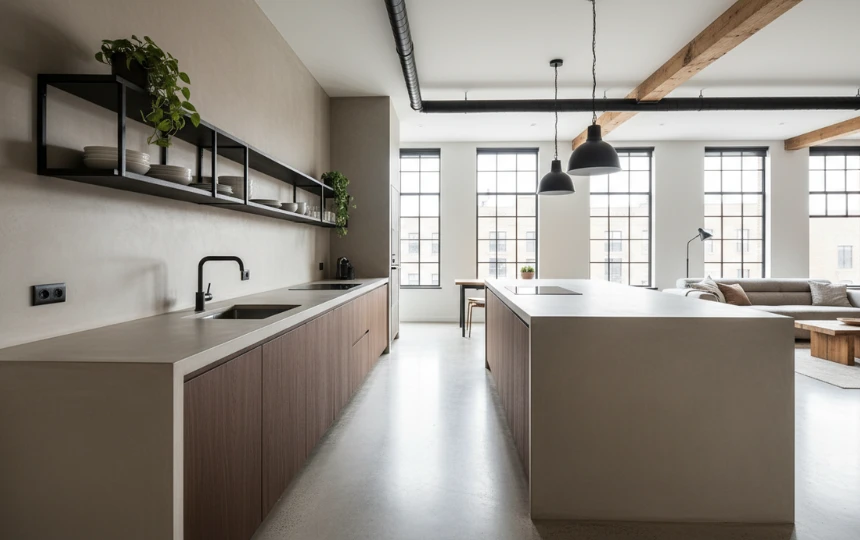
Microcement — an ultra-thin cementitious coating applied directly over existing surfaces — creates a completely seamless, grout-free backsplash that flows from the wall onto the countertop (or vice versa) without interruption. The result is the visual calm of a monolithic surface: no tile joints, no grout to discolor, no visual pattern competing with anything else in the kitchen. Available in a wide range of tones from warm ivory through charcoal, the material can be tinted to coordinate precisely with cabinetry or countertop colors. Properly sealed with a two-part epoxy sealer, microcement is water and stain-resistant and can be lightly cleaned with a damp cloth. The installation requires a skilled applicator — poor application shows immediately — but the result for industrial, loft, and minimalist kitchens is genuinely extraordinary.
Ready to Plan Your Full Kitchen Remodel?
Our free renovation planner helps you track materials, contractors, timelines, and budget in one organized place.
Open the Renovation Planner →Before You Commit: 5 Questions Every Backsplash Buyer Should Ask
① How much moisture does this zone see? High-splash zones (behind the sink, above a wok burner) need non-porous, easy-clean surfaces. ② Will I resell within 5 years? Bold, personal choices are harder to sell — keep them if this is your forever home. ③ What’s my grout tolerance? Small tiles = many grout joints = more cleaning. ④ Does the material age well? Some materials patina beautifully; others just look tired. ⑤ Have I seen it at full scale? Always order samples and tape them to your wall for at least a week before committing.
The Backsplash That’s Right for Your Kitchen
The best backsplash is the one that you stop noticing after a while — not because it’s forgettable, but because it’s become so naturally part of the kitchen that you can’t imagine it any other way. That’s the goal: a choice that feels inevitable in retrospect, not like a trend you chased.
Start with your kitchen’s existing character — the cabinet color, the countertop material, the amount of natural light — and let the backsplash respond to those rather than fight them. If everything else is calm and neutral, the backsplash can be brave. If the rest of the kitchen is already doing a lot of work, let the backsplash be the quiet, textured finishing touch rather than another statement.
Use the tools below to get your kitchen remodel fully organized — from style direction to final budget.
Frequently Asked Questions About Kitchen Backsplashes
Zellige tile is the most talked-about backsplash choice in 2026 — particularly in deep hunter green and terracotta. Fluted ceramic tiles are a close second, valued for their texture and contemporary architectural feel. Large-format porcelain with minimal grout lines remains the top choice for minimalist and Japandi-style kitchens where low maintenance is a priority.
Kitchen backsplash installation typically costs between $400 and $4,000+ depending on the size of the area, the tile material chosen, and your location. Basic subway tile on a standard backsplash (15–20 sq ft) runs $300–$800 including labor. Premium materials like zellige, stone slab, or smoked glass can cost $2,000–$8,000+ for the same area. Use our renovation cost calculator for a personalized estimate.
Large-format porcelain and microcement are the easiest backsplashes to keep clean — they have minimal or no grout joints where grease and grime accumulate. Smoked glass panels and unlacquered brass are also simple to wipe clean. Avoid small mosaic tiles, natural stone with many grout joints, or limewash plaster near high-splash zones if easy maintenance is your top priority.
Matching the backsplash and countertop (using the same stone or quartz slab for both) creates the most seamless, high-end result — but it isn’t necessary and can feel one-dimensional. A more common and successful approach is complementing rather than matching: choosing a backsplash that harmonizes with the countertop’s tones while offering a different material or texture. For example, warm zellige tile in terracotta pairs beautifully with a honed cream quartzite countertop without being identical.
Standard backsplash height is 18 inches above the countertop — enough to protect the wall from splashes while staying below the underside of upper cabinets. Full-height backsplashes (running from countertop to the underside of upper cabinets, typically 18–24 inches) create a more finished look and are better for high-splash areas. Behind a range with no upper cabinets, the backsplash can run all the way to the range hood or ceiling — this “statement zone” is where dramatic materials like stone slabs or brass panels have the most impact.
Peel-and-stick backsplash tiles are a reasonable short-term solution for renters or those on an extremely tight budget, but they rarely hold up convincingly over time. The edges lift, the seams become visible, and they don’t handle heat near a range well. If you’re looking for an affordable but genuinely good-looking permanent backsplash, standard ceramic subway tile installed by a competent tiler starts at around $6 per square foot installed and will look better and last decades longer.